Comprehensive Guide to Setting Up the Swish Eye Home Security Camera for iOS (Latest Versions)
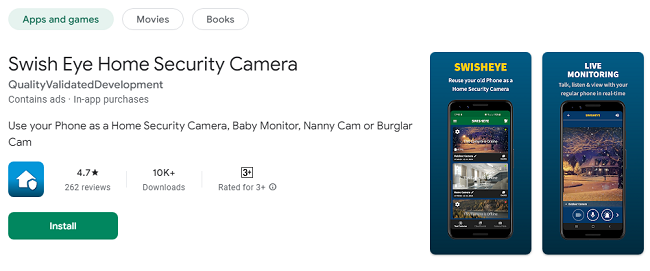
Swish Eye Home Security Camera is an advanced and easy-to-use security camera system designed to provide comprehensive monitoring and protection for your home.
With its cutting-edge features, user-friendly interface, and seamless integration with iOS devices, setting up the Swish Eye camera can be done effortlessly.
This guide provides a step-by-step walkthrough on how to set up the Swish Eye Home Security Camera on the latest versions of iOS, highlighting its features, installation process, and answers to frequently asked questions (FAQs).
Table of Contents
Introduction to Swish Eye Home Security Camera
Key Features of Swish Eye Home Security Camera
System Requirements
Step-by-Step Installation Process
4.1. Unboxing and Setting Up the Camera
4.2. Installing the Swish Eye App on iOS
4.3. Connecting the Camera to Wi-Fi
4.4. Pairing the Camera with the App
4.5. Camera Configuration and Customization
Setting Up Motion Detection and Alerts
Viewing Live Feed and Recorded Footage
Integrating with Smart Home Devices
Advanced Settings and Features
Troubleshooting Common Issues
FAQs
Conclusion
1. Introduction to Swish Eye Home Security Camera
The Swish Eye Home Security Camera is a versatile surveillance solution that combines high-definition video quality with smart features, making it an excellent choice for securing your home.
It offers real-time video streaming, motion detection, night vision, and two-way audio. The camera can be controlled and monitored through a mobile app, available on both iOS and Android devices.
Swish Eye's user-friendly design and advanced technology allow homeowners to keep an eye on their property remotely, ensuring peace of mind.
2. Key Features of Swish Eye Home Security Camera on iOS
Before diving into the installation process, let's take a look at some of the standout features of the Swish Eye Home Security Camera:
High-Definition Video Quality: The camera offers crisp HD video quality (1080p or higher), ensuring that every detail is captured clearly.
Two-Way Audio: You can listen and talk through the camera, making it ideal for communicating with family members, pets, or even deterring intruders.
Motion Detection: The camera detects motion and sends instant alerts to your iOS device, so you can take immediate action.
Night Vision: The built-in infrared LEDs enable the camera to capture clear footage even in low-light conditions.
Cloud Storage: Swish Eye offers cloud storage options to save recorded footage securely. You can access it anytime through the app.
Remote Access: Control and monitor the camera remotely via the Swish Eye mobile app, available for iOS devices.
Smart Home Integration: Swish Eye is compatible with major smart home ecosystems like Amazon Alexa and Google Assistant.
3. System Requirements
To set up the Swish Eye Home Security Camera on your iOS device, ensure that you meet the following system requirements:
Device: iPhone, iPad, or iPod touch with iOS 12 or later.
Wi-Fi: A stable Wi-Fi connection (2.4GHz network is recommended for best performance).
App: Swish Eye app, available for free from the App Store.
Camera: Swish Eye Home Security Camera (model may vary depending on your purchase).
4. Step-by-Step Installation Process
4.1. Unboxing and Setting Up the Camera
Start by unboxing the Swish Eye Home Security Camera. Inside the box, you will typically find the following items:
Swish Eye Camera
Power adapter and cable
Mounting bracket (if applicable)
Quick start guide
Screws and wall anchors (if mounting on a wall)
Place the camera in a location where you want to monitor, ensuring it has a clear view of the area you wish to surveil.
If you plan to mount the camera on a wall, use the provided mounting bracket and screws to secure it in place.
4.2. Installing the Swish Eye App on iOS
Open the App Store on your iOS device.
Search for "Swish Eye" in the search bar.
Tap the Download button to install the app.
Once installed, open the app by tapping the Swish Eye icon on your home screen.
4.3. Connecting the Camera to Wi-Fi
Plug the Swish Eye camera into a power outlet using the provided power adapter and cable.
Wait for the camera's LED indicator to start blinking, indicating that it is in pairing mode.
Open the Swish Eye app on your iOS device.
Sign in to your account or create a new one if you don’t have one already.
Tap the Add Device button in the app.
Select Swish Eye Camera from the list of available devices.
Follow the on-screen instructions to connect the camera to your Wi-Fi network. Make sure you select a 2.4GHz network (as most cameras do not support 5GHz Wi-Fi).
4.4. Pairing the Camera with the App
Once the camera is connected to Wi-Fi, the app will prompt you to pair the camera with your account.
This step typically involves scanning a QR code on the camera or entering a unique device ID.
Follow the instructions on the app to complete the pairing process.
4.5. Camera Configuration and Customization
After successfully pairing the camera, you can begin configuring the camera settings to suit your needs:
Name the Camera: Give your camera a unique name to help identify it in the app (e.g., "Front Door Camera").
Adjust Camera Angle: Position the camera so that it has a clear line of sight of the area you want to monitor.
Set Up Notifications: Enable motion detection alerts to receive notifications whenever the camera detects movement.
Customize Video Quality: Adjust the video quality settings based on your internet speed. You can choose between different resolution options like 720p, 1080p, or higher.
5. Setting Up Motion Detection and Alerts
One of the key features of the Swish Eye camera is motion detection. Here's how to set it up:
Open the Swish Eye app.
Go to the Settings section of the camera.
Select Motion Detection and toggle it on.
Adjust the motion sensitivity to suit your needs. Higher sensitivity will trigger alerts for smaller movements, while lower sensitivity will only trigger alerts for larger movements.
Set up motion zones if you want the camera to focus on specific areas within its field of view.
6. Viewing Live Feed and Recorded Footage
After setting up the camera, you can view the live feed anytime through the Swish Eye app:
Open the Swish Eye app.
Select the camera you want to view.
Tap the Live Feed button to view the live video stream.
To view recorded footage, go to the Playback section of the app and select the date and time of the footage you wish to review.
7. Integrating with Smart Home Devices
Swish Eye is compatible with popular smart home ecosystems, such as Amazon Alexa and Google Assistant. To integrate with these devices:
Open the Swish Eye app and go to the Settings section.
Select Smart Home Integration.
Follow the instructions to link your Swish Eye account to Alexa or Google Assistant.
Once linked, you can use voice commands to control the camera, such as "Alexa, show the front door camera" or "Hey Google, turn on the security camera."
8. Advanced Settings and Features
Swish Eye offers a range of advanced features that enhance the camera’s functionality:
Cloud Storage: Enable cloud storage to save recorded footage securely. This allows you to access footage from anywhere.
SD Card Support: Some models support local storage via an SD card. You can insert an SD card into the camera to store footage locally.
Pan and Tilt: If your camera supports pan and tilt functionality, you can adjust the viewing angle remotely via the app.
Privacy Mode: Enable privacy mode to turn off the camera when you’re home, ensuring that your footage is not recorded unnecessarily.
9. Troubleshooting Common Issues
Here are some common issues you might encounter and how to resolve them:
Camera Not Connecting to Wi-Fi: Ensure that your Wi-Fi network is a 2.4GHz network and that the camera is within range of the router.
No Video Feed: Check the camera’s power connection and make sure it is correctly paired with the app.
Motion Detection Not Working: Verify that motion detection is enabled and the sensitivity is set correctly.
10. Frequently asked questions
Q1: Can I use the Swish Eye camera without an internet connection?
A1: No, the Swish Eye camera requires an internet connection to function properly, as it relies on cloud storage and remote access.
Q2: How can I share access to my camera with someone else?
A2: You can invite others to view the camera by going to the Settings section in the app and selecting Share Device.
Q3: How long does the battery last on the Swish Eye camera?
A3: The Swish Eye camera is powered by a constant connection to a power outlet, so there is no battery life concern for continuous operation.
11. Conclusion
Setting up the Swish Eye Home Security Camera on iOS is a straightforward process that can be completed in just a few steps.
By following the instructions in this guide, you can ensure that your camera is properly installed, configured, and ready to provide reliable surveillance for your home.
With its powerful features, such as motion detection, night vision, and smart home integration, Swish Eye offers a comprehensive security solution for modern homeowners.
Updates