Complete Guide to Setting Up the Swish Eye Home Security Camera for Android, iOS, and Windows
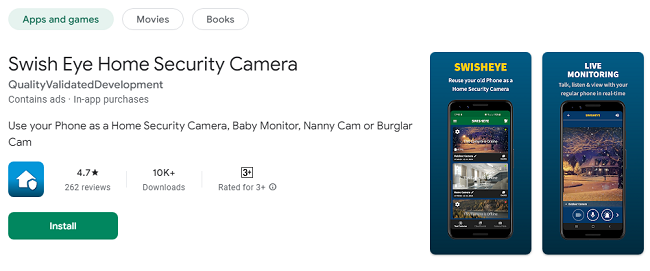
Swish Eye Home Security Camera is a versatile and reliable home surveillance solution, providing HD video, two-way audio, motion detection, and cloud storage. Whether you're looking to secure your home or monitor your property remotely, the Swish Eye camera offers an easy-to-use and effective way to keep your environment safe. This guide will walk you through setting up the Swish Eye Home Security Camera on Android, iOS, and Windows, with detailed instructions, troubleshooting tips, and answers to frequently asked questions.
Table of Contents
Introduction to Swish Eye Home Security Camera
Features of the Swish Eye Camera
System Requirements
Setting Up the Camera on Android
Setting Up the Camera on iOS
Setting Up the Camera on Windows
Connecting the Camera to Wi-Fi
Configuring Motion Detection and Alerts
Using the Camera: Live Feed and Playback
Troubleshooting Common Issues
Frequently Asked Questions
Conclusion
1. Introduction to Swish Eye Home Security Camera
The Swish Eye Home Security Camera is designed to provide top-notch security for your home or office. With a sleek design and advanced features like motion detection, night vision, and HD video quality, it ensures that you are always connected to your property.
Whether you are on Android, iOS, or Windows, the Swish Eye app makes it easy to set up and monitor your camera.
2. Features of the Swish Eye Camera app
The Swish Eye camera is packed with features to ensure comprehensive surveillance and ease of use:
HD Video: Enjoy high-definition video quality (1080p) for clear and detailed footage.
Two-Way Audio: Communicate with anyone in the camera’s range using the built-in microphone and speaker.
Motion Detection: Receive alerts when motion is detected, ensuring you never miss an event.
Night Vision: Infrared night vision ensures visibility even in low-light conditions.
Cloud Storage: Save video footage securely in the cloud for easy access.
Smart Home Integration: Works with Alexa and Google Assistant for voice commands and smart home integration.
3. System Requirements
Before you begin setting up the Swish Eye camera, make sure your device meets the following system requirements:
For Android:
Operating System: Android 6.0 or higher
Wi-Fi: 2.4GHz Wi-Fi network (5GHz not supported)
App: Swish Eye app from Google Play Store
For iOS:
Operating System: iOS 10.0 or later
Wi-Fi: 2.4GHz Wi-Fi network
App: Swish Eye app from the App Store
For Windows:
Operating System: Windows 10 or higher
Wi-Fi: 2.4GHz Wi-Fi network
App: Swish Eye app available on the Windows Store or via web platform
4. Setting Up the Camera on Android
Setting up the Swish Eye camera on Android devices is straightforward. Follow these steps:
Unbox and Power On: Plug the camera into a power source using the provided adapter.
Download the App: Open the Google Play Store, search for Swish Eye, and tap Install.
Create an Account: Once installed, open the app and sign up or log in if you already have an account.
Add the Camera: Tap the + icon or Add Device to start the setup process. Choose Swish Eye Camera from the list.
Connect to Wi-Fi: Follow the on-screen instructions to connect the camera to your Wi-Fi network.
Scan the QR Code: The app will prompt you to scan the QR code displayed on the camera to complete the pairing process.
Customize Settings: Once connected, adjust settings like motion detection sensitivity, video quality, and notification preferences.
5. Setting Up the Camera on iOS
Setting up the Swish Eye camera on an iPhone or iPad is just as simple. Here’s how to do it:
Unbox and Power On: Plug in the camera and ensure it’s powered on.
Download the App: Go to the App Store, search for Swish Eye, and tap Get to download the app.
Create an Account: Open the app, and sign up for a new account or log in if you already have one.
Add the Camera: Tap the + icon to add a new device and select Swish Eye Camera.
Connect to Wi-Fi: Follow the prompts to connect the camera to your 2.4GHz Wi-Fi network.
Scan the QR Code: Scan the QR code displayed on the camera to pair it with your app.
Adjust Settings: After pairing, customize settings like motion detection, video resolution, and alerts.
6. Setting Up the Camera on Windows
To set up the Swish Eye camera on a Windows PC, follow these steps:
Unbox and Power On: Ensure the camera is plugged into a power source.
Download the App: Go to the Windows Store or use the web platform to download the Swish Eye app.
Create an Account: Open the app and sign up or log in to your existing account.
Add the Camera: Tap the Add Device button and select Swish Eye Camera.
Connect to Wi-Fi: Follow the on-screen instructions to connect the camera to your 2.4GHz Wi-Fi network.
Scan the QR Code: Scan the QR code to complete the pairing process.
Customize Settings: Once paired, adjust your camera settings, including motion detection and video quality.
7. Connecting the Camera to Wi-Fi
The camera needs to be connected to a 2.4GHz Wi-Fi network for proper functionality. Here’s how to connect it:
Ensure that the camera is powered on.
Open the Swish Eye app on your Android, iOS, or Windows device.
Go to the Add Device section and select Swish Eye Camera.
The app will prompt you to choose your Wi-Fi network. Select your 2.4GHz Wi-Fi network.
Enter your Wi-Fi password and confirm the connection.
Wait for the camera to connect. Once connected, the LED indicator will turn solid.
8. Configuring Motion Detection and Alerts
Motion detection is one of the most useful features of the Swish Eye camera. To configure it:
Open the Swish Eye app and select the camera you want to configure.
Go to Settings and enable Motion Detection.
Adjust the Sensitivity level to control how sensitive the camera is to movement.
Set up Motion Zones if you want to focus on specific areas within the camera’s view.
Enable Notifications to receive alerts when motion is detected.
9. Using the Camera: Live Feed and Playback
You can access live footage and recorded videos at any time:
Live Feed: Open the Swish Eye app, select the camera, and tap Live Feed to view real-time video.
Playback: To view recorded footage, go to the Playback section, select the date and time, and play the video.
10. Troubleshooting Common Issues
Here are some common issues and solutions:
Camera Not Connecting to Wi-Fi
Ensure that you are using a 2.4GHz Wi-Fi network (5GHz is not supported).
Make sure the camera is within range of the Wi-Fi router.
Restart the camera and try reconnecting.
No Video Feed
Check that the camera is powered on and connected to the app.
Verify that your internet connection is stable.
Restart the app and try again.
Motion Detection Not Working
Ensure that motion detection is enabled in the app.
Adjust the sensitivity settings to a higher level.
Make sure the camera has a clear view of the area you want to monitor.
11. Frequently Asked Questions
Q1: Can I use the Swish Eye camera without an internet connection?
A1: No, the Swish Eye camera requires an internet connection to stream video and send alerts.
Q2: Does the Swish Eye camera support 5GHz Wi-Fi?
A2: No, the Swish Eye camera only supports 2.4GHz Wi-Fi networks.
Q3: How do I share access to my camera with others?
A3: You can share access by going to the Settings section in the app and selecting Share Device. Enter the email address of the person you want to share access with.
12. Conclusion
Setting up the Swish Eye Home Security Camera on Android, iOS, and Windows is a quick and easy process that ensures your home or office is always secure.
By following the steps outlined in this guide, you can enjoy all the features the Swish Eye camera has to offer, including HD video, motion detection, two-way audio, and more.
Whether you're at home or on the go, the Swish Eye app allows you to monitor your property and stay informed about any security concerns.
Updates